In the previous post in this series, we talked about why it is a good idea to track incremental conversions on your website. Now, we’ll take a look at exactly how to set those conversion actions up in Google Analytics.
Setting Up Goals
The easiest way to do this (and without any coding) is to use goals. As per Google:
Goals measure how well your site or app fulfills your target objectives. A goal represents a completed activity, called a conversion, that contributes to the success of your business.
We’re going to set up goals that will track when someone reaches certain pages on your website that mark your identified incremental conversions. You will need Admin access to your Google Analytics to do this.
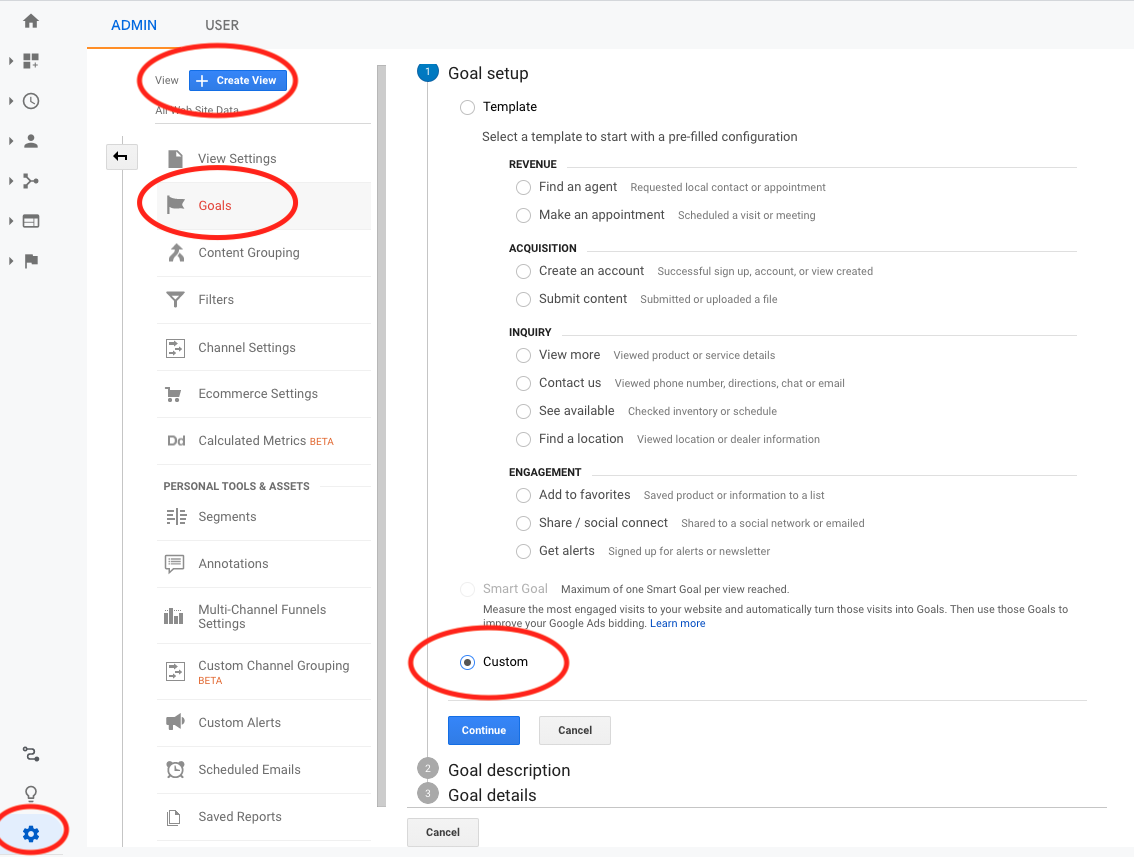
1. Go to Admin > View > Goals and click the red + New Goal button at the top. That will bring you here:
Under Goal Setup, choose Custom at the bottom and then click Continue.
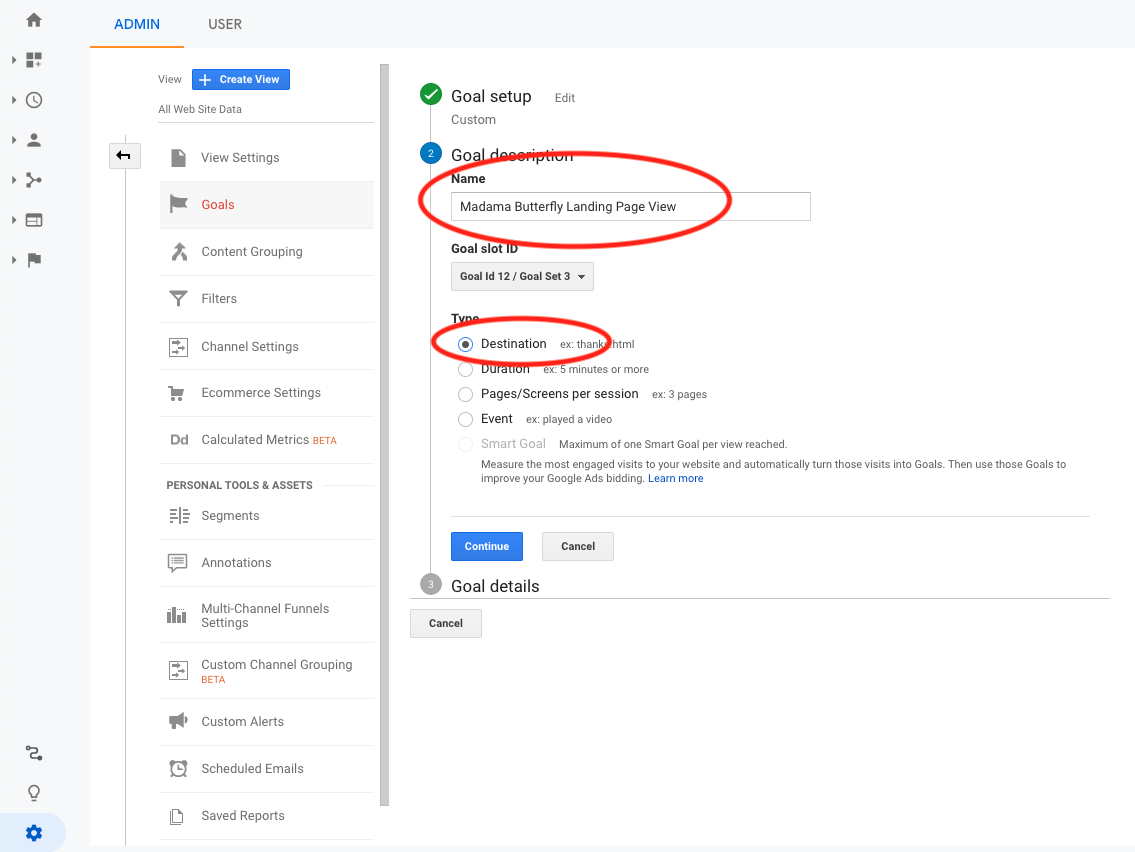
2. Choose a name for your goal that will be easy to identify when viewing the data in Google Analytics. Then, choose Destination as the goal type.
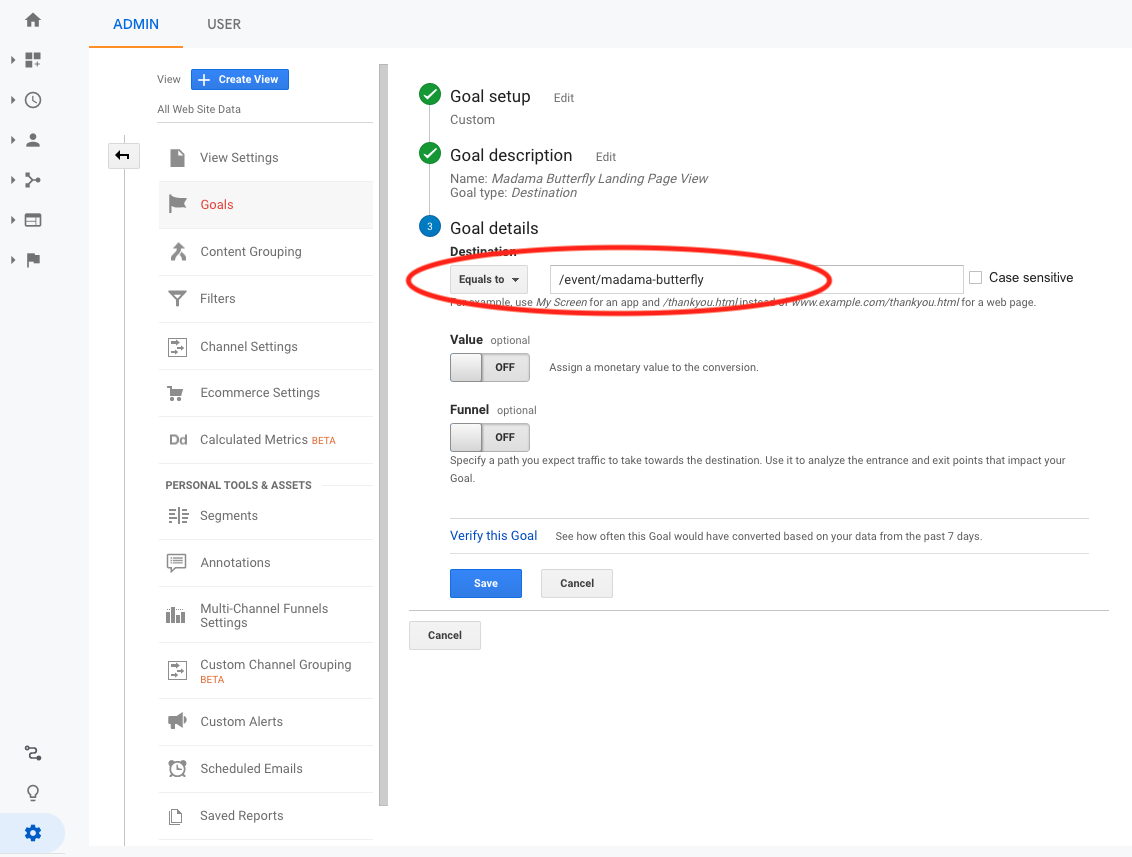
3. Enter the URL of the page that marks your incremental conversion.
Click Save and that’s it! You have now created a goal.
This goal will track every time someone views that URL on your website.
How To View Goals
You can view your goal activity in a number of places in Google Analytics. There is a dedicated area in Conversions > Goals.
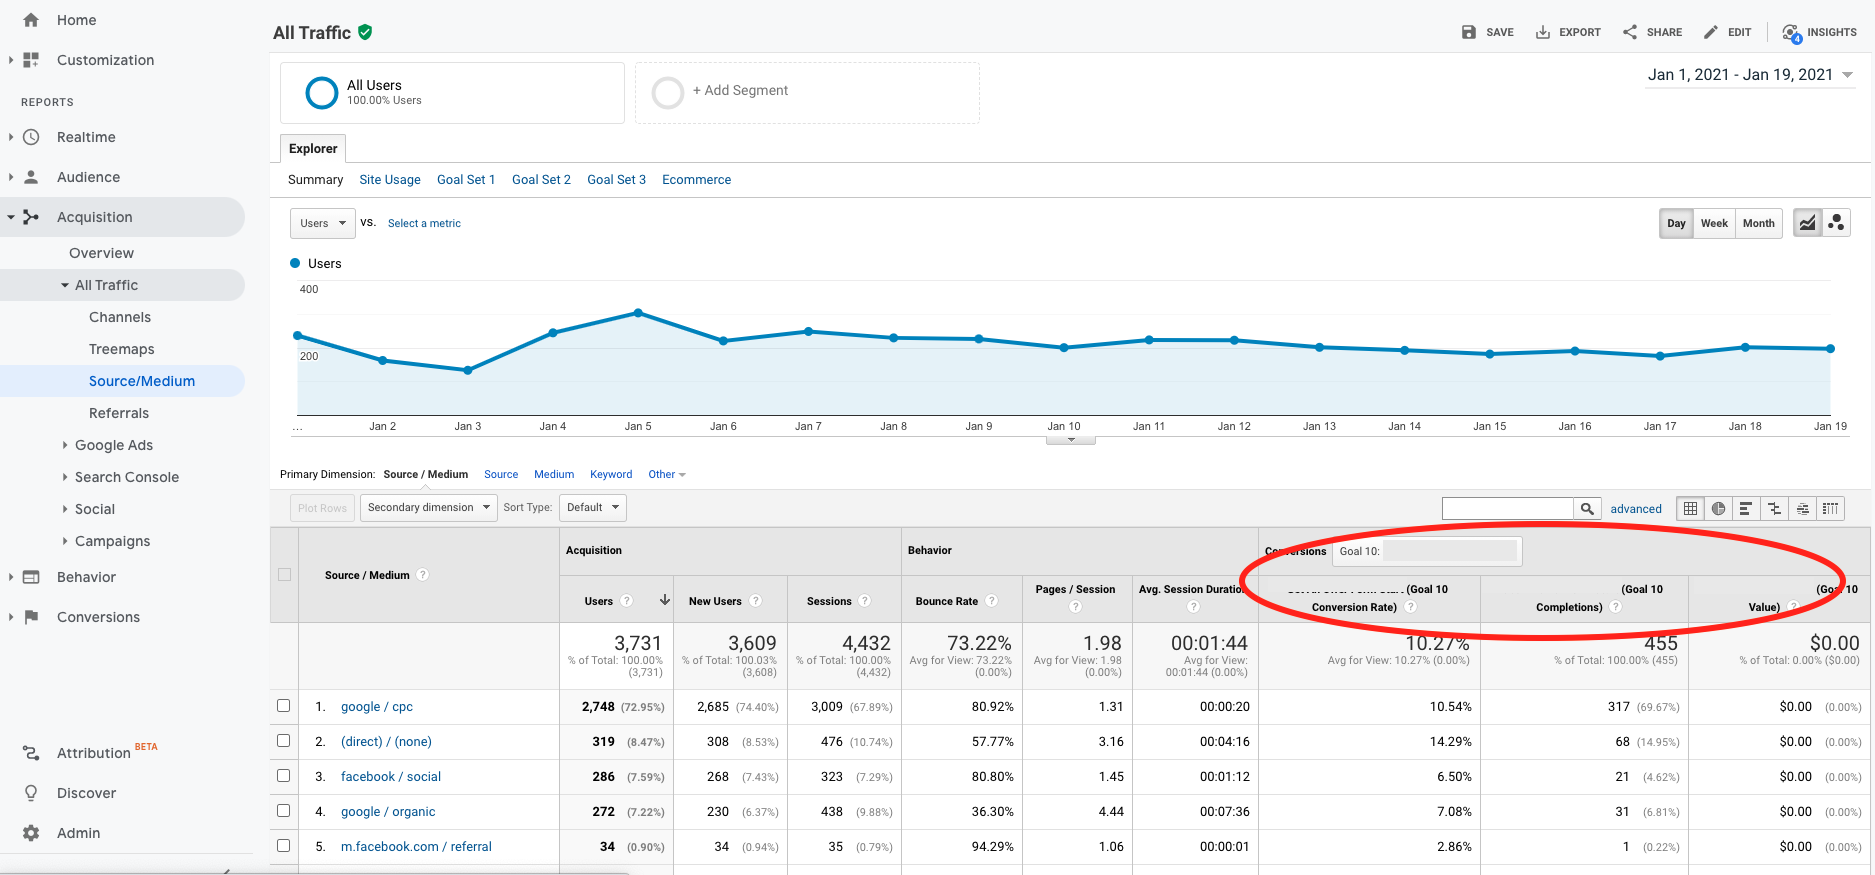
One of my favorite reports to view in terms of goal completions is Acquisition > All Traffic > Source/Medium. This report shows you where traffic to your website is coming from. You can also view that data in terms of goal completion to see what traffic source is bringing in the most conversions.
In this example, we can see that paid Google advertising leads to the most conversions for this particular goal.
Now that you have these goals set up, you will start to see data populate in your Google Analytics account within 24-48 hours.
In the next post in this series, we’ll talk about how to track these metrics and make more informed marketing decisions using them.


