If you work with Photoshop to create graphics for your organization and aren’t using Smart Objects, you’re missing out on so much. Back in July, 2015 we examined how Smart Objects inside premium Photoshop templates to create stunning looking graphics but creating your own templates is easier than you might think.
Adobe defines Smart Objects as “that contain image data from raster or vector images, such as Photoshop or Illustrator files. Smart Objects preserve an image’s source content with all its original characteristics, enabling you to perform nondestructive editing to the layer.”
In English, this means you can insert and edit a layer inside a document without impacting any of the corresponding layers.
One of the most useful applications is creating a template where much of the design doesn’t change except for one or a few key layers. This becomes even more helpful if those variable design elements don’t always have the same aspect ratio or dimensions the template requires.
Here’s an example: I needed a template for creating Facebook header images an artist* could use to promote upcoming events. In addition to being able to change out text, the template needed a way to swap out photos without modifying the dimensions of that layer inside the template. The solution: Make the layer a Smart Object.
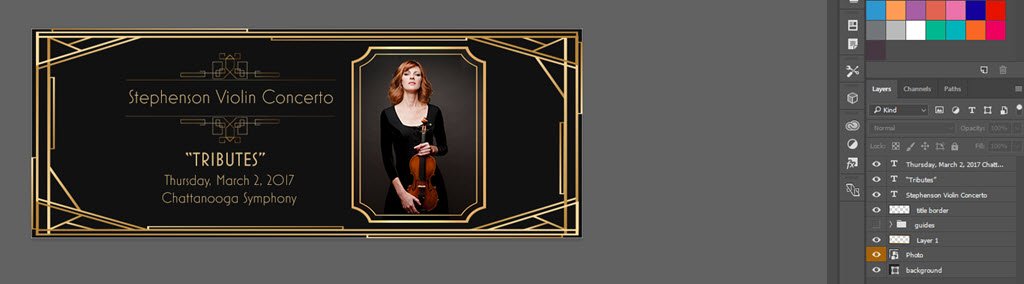
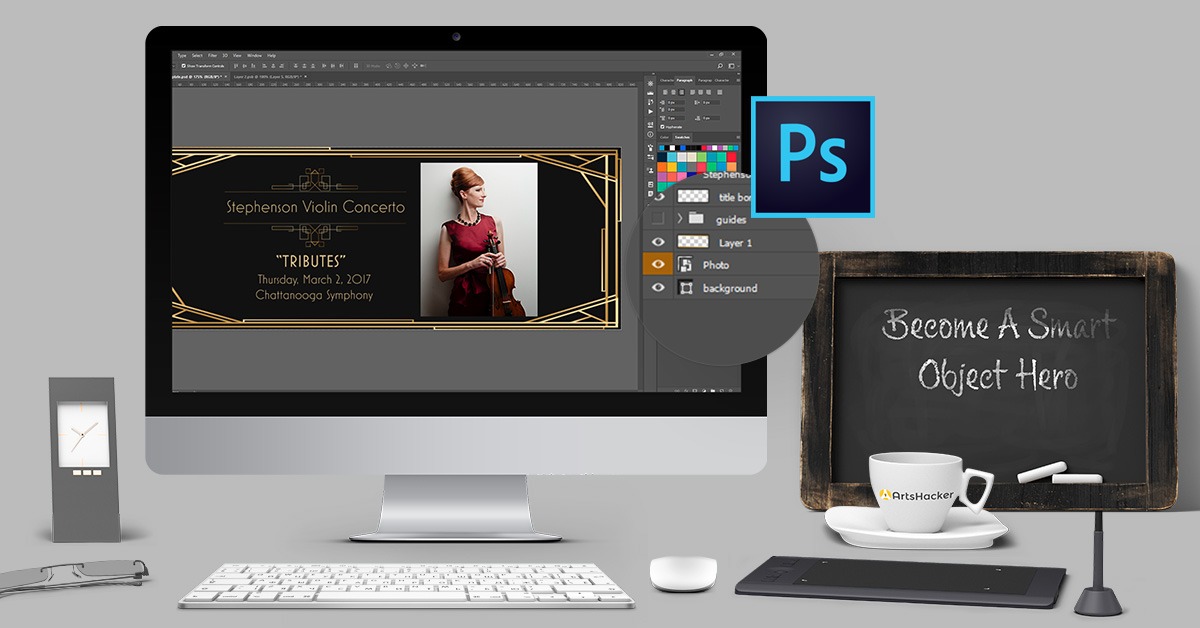
Here’s the finished template where you can see the artist photo layer is a Smart Object:
Creating Smart Object Layers
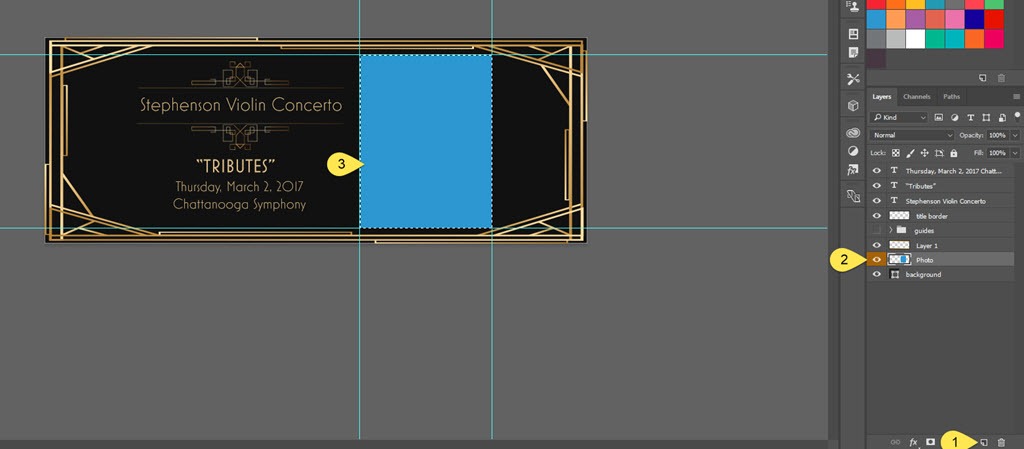
- Create a new layer
- Select the area inside the template where the Smart Object content will appear. In this instance, I used some simple guides to align everything precisely with the surrounding design elements.
- Fill the area with a solid color, any color will do so long as it is contrasting.

- Right click the layer and select “Convert to Smart Object.”
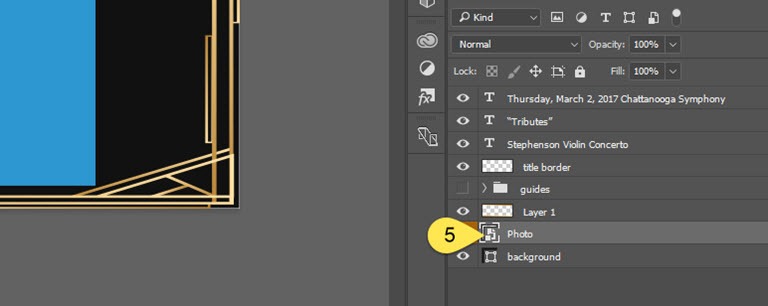
- You’ll now see the layer is displayed with a link icon. Double click that icon.
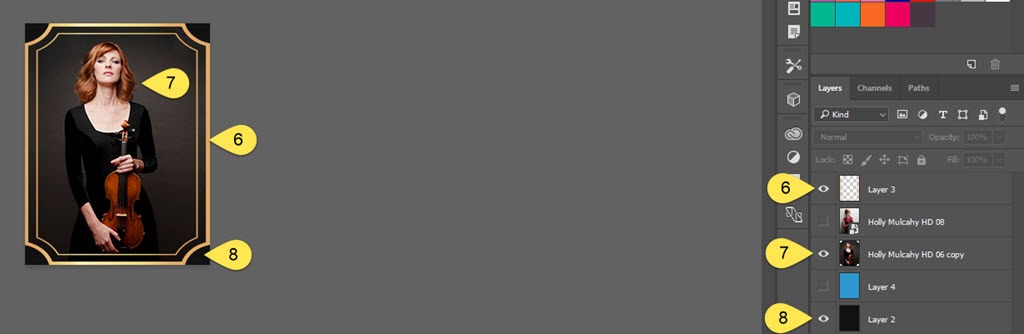
- You can add whatever content you want in this new layer. This example is a bit fancy in that it includes an art deco image frame.
- You can insert and resize any image you wish and regardless how much of the source image falls outside the layer boundaries, only the part you see will appear in the template. This is how you’re able to easily maintain precise dimensions from the Smart Object layer to the template.
- I added a new background color layer to match the template.
When you’re all done adding content, ctrl + s will save any changes made inside the smart layer and push through to the parent template file. This brings us right back to how the finished template looked.
Saving the template as a psd file will automatically save Smart Object files so you can edit as needed any point in the future. And remember, the useful part here is regardless the size of the image placed into the Smart Object, only the visible portion will appear inside the template document.
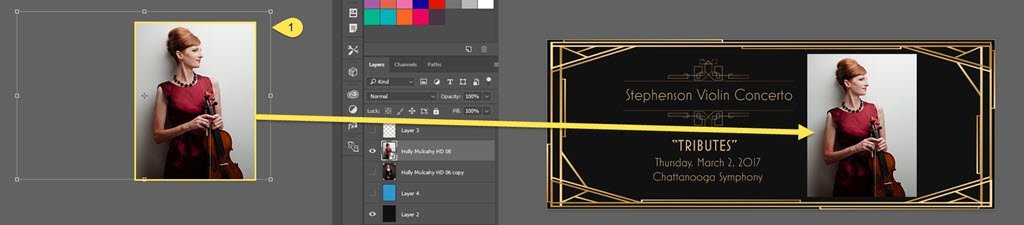
- Here, you can see most of the new image layer falls outside the visible portion of the Smart Object but once you ctrl + s, only the visible part is pushed to the template.
In Conclusion
The above process takes less than two minutes so if it seems like you’re flying through everything, don’t worry; it really is that straightforward.
It doesn’t take much to see just how much you can accomplish by adding multiple Smart Object layers inside a single template document.
For instance, if you create a hero image style header for an event where you need to change the who/what/where copy, an artist photo, and a sponsor logo, you can easily use Smart Objects for the latter two and be secure that each new event hero image will maintain strong brand consistency.
If you want to get super fancy, you can create Smart Object inside Smart Object files. #ThereIsNoSpoon
[box type=”note”]* Full disclosure mode: the artist in this example is also my wife, violinist Holly Mulcahy.[/box]