One of the most frustrating and expensive problems arts managers deal with is email subscriber inactivity and no matter how hard you work to avoid it, just as sure as the sun will rise in the morning, your email lists will have inactive users, commonly referred to as non-responders.
In the most extreme situations, arts managers hold onto these addresses due to a misplaced belief that the more addresses in your lists, the better; add to that, the thought of going through subscribers one-by-one to weed out non-responders is enough to make you call in sick that day.
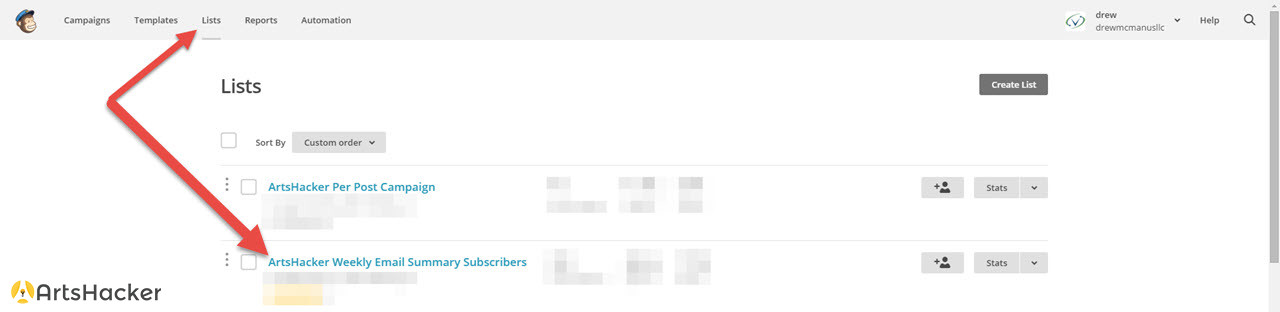
Fortunately, most email marketing clients provide tools that make creating and implementing an effective non-responder strategy a breeze and today’s ArtsHack will focus on how you can go about that process via one of the most popular email marketing clients available: MailChimp.
And no worries, even if you use a different provider, you’ll still find this approach useful but you’ll need to verify with your provider on how to implement.
Identifying Non-Responder Subscribers
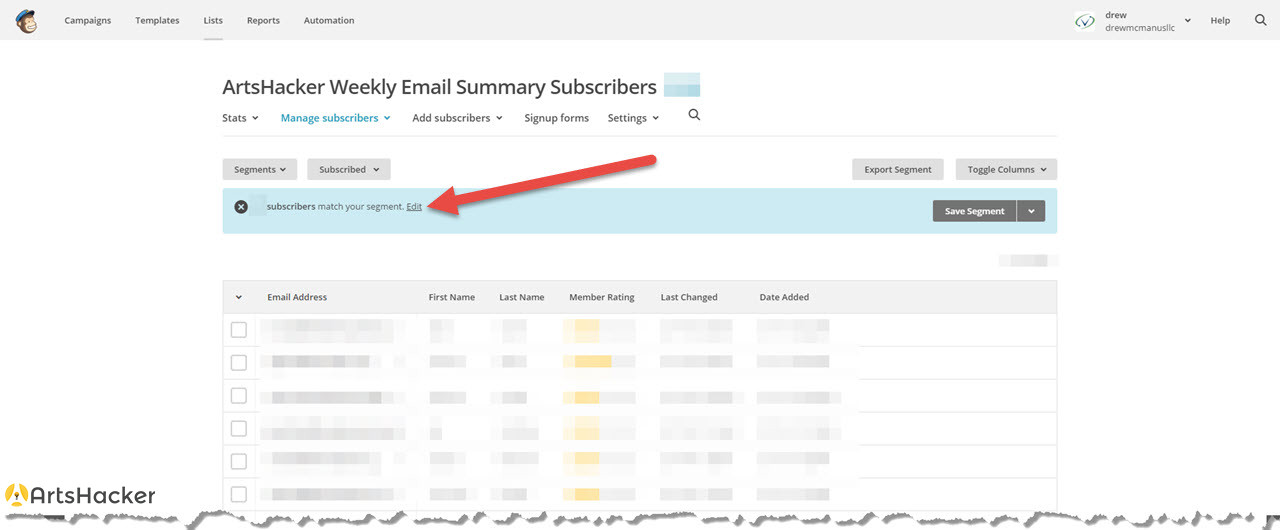
Goal: create a list segment that identifies inactive/non-responder addresses to either suppress and/or remove via export.
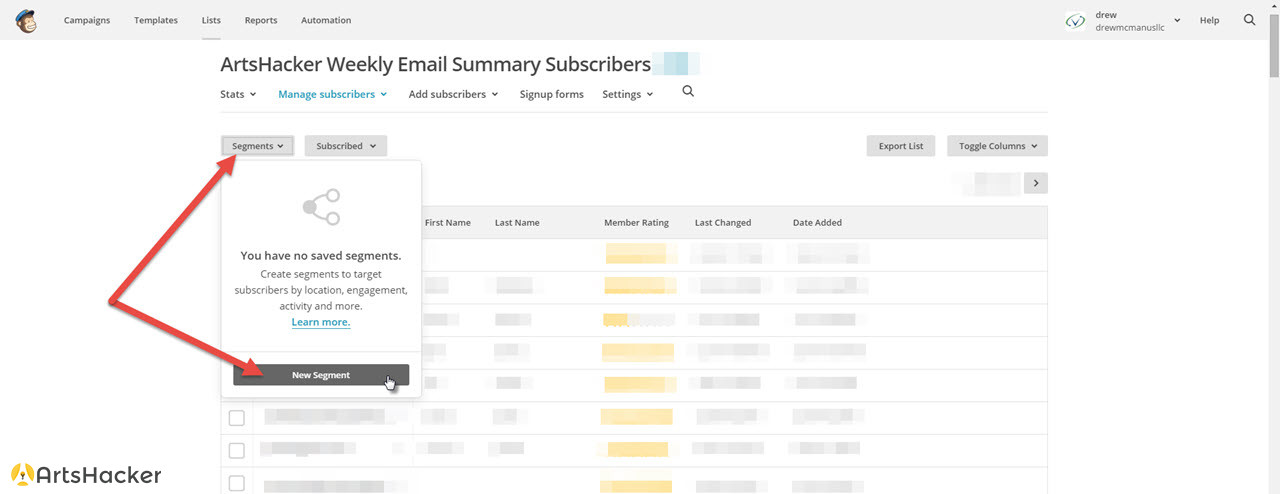
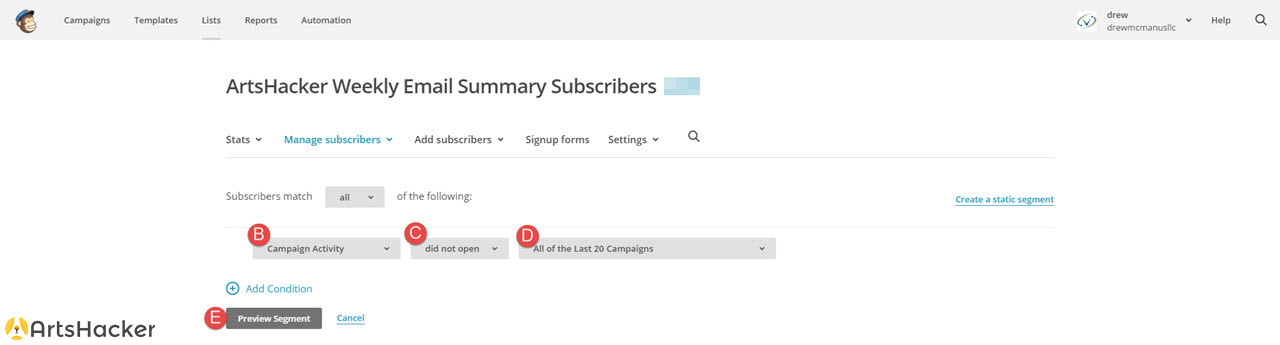
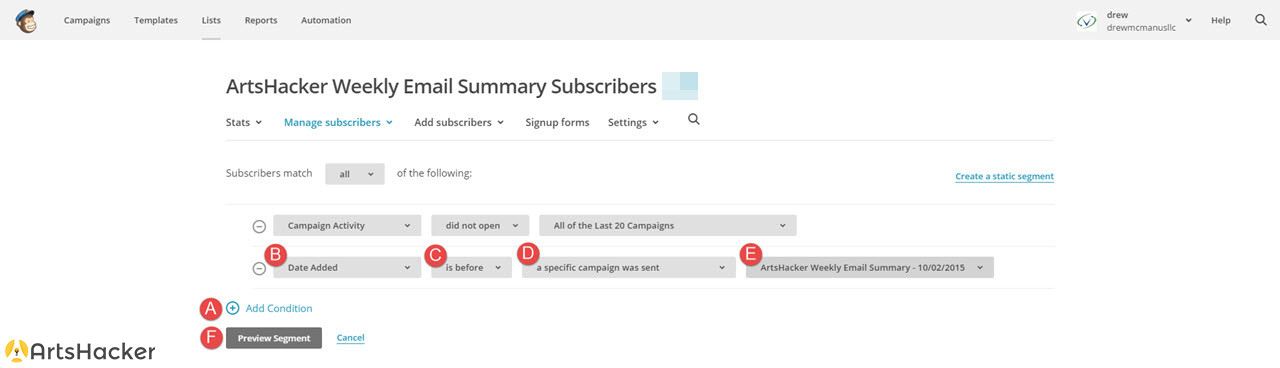
Although MailChimp provides two methods for identifying non-responders, Campaign Activity and Member Rating, I recommend using the former due to added control for filtering parameters used to identify non-responders that should be removed. If you wish to use the latter method, you can find additional instructions via MailChimp’s documentation.
[divider]
[divider]
[divider]
[divider]
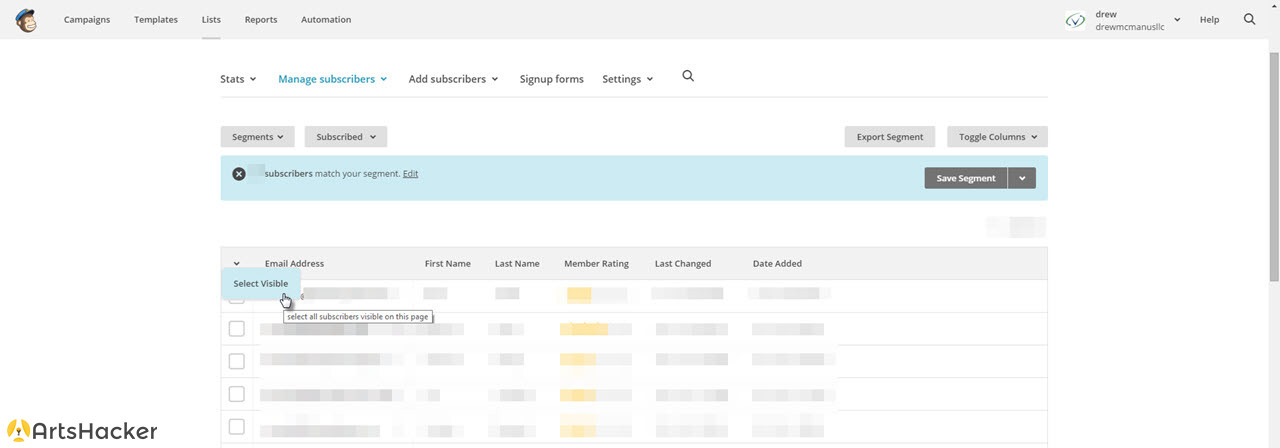
At this point you have a choice to make, you can either unsubscribe those addresses or save them as a new segment; for the latter option, you’ll use that new segment to send a special validation campaign.
[divider]
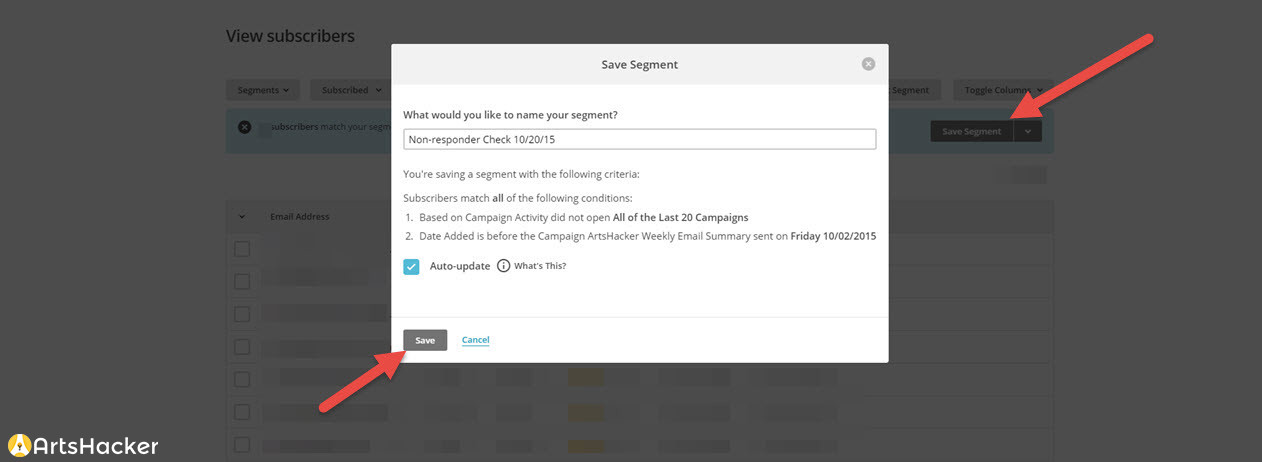
Pro Tip: if you use a MailChimp plan based on the number of subscribers, you can always export the non-responder segment as a .csv file then remove those subscribers from your active lists, thereby lowering your subscriber count. If you’ve never performed a non-responder check, you could easily cut your list size by 40 percent or more and save some serious money by allowing you to move down to a lower subscriber tier. If you plan charges per message, then the lower count reduces costs on a per-campaign basis; either way, it’s a pure win-win that you can show off in the next staff meeting.
[/box]
At this point, if you went with Option 1 above, you’re all done, if you went with Option 2, continue to the next section.
Confirming And Reactivating Non-Responder Subscribers
In order to help make sure you aren’t removing a subscriber that would otherwise be active, you’re going to send a special email message to help wake them up and entice them back into the warm glow of patron engagement. To that end, here are some must-follow steps to maximize this process:
- Use a unique subject line: don’t use anything from your standard campaign(s) just in case those are functioning as triggers for spam and/or user-defined email filters.
- Send at a unique day/time: send the message out at a day/time that is completely different than your typical messages.
- Keep the message short: don’t use more than two-three sentences and be very direct with your message. Make sure subscribers are clear that this message is to validate their email and determine if they will keep receiving messages.
- Offer an incentive: although simply opening a message will give you what you need, take it to the next level and get a higher degree of engagement by giving the subscriber something to click, like an incentive link/button.
- Provide the option to update: you can also include a link to the subscriber’s “manage your subscription settings” admin panel and remind them that they can update their email address along with editing additional subscription options.
Keep an eye on the campaign’s report and remove any names from the non-responder segment for any subscriber opening the message. You can now either set the remaining segment members to “unsubscribe” or export to a .csv file then remove from your lists entirely.
[box]
Pro Tip: keep these non-responder .csv files handy so you can use them for suppression lists down the road. We’ll cover what those are and how to use them in a future post.
[/box]
Once you’ve cleaned up your lists, you should see a positive uptick in your campaign and list stats thanks to higher open rates. If you want to take this approach to an even higher degree of refinement, you can begin to use a variety of custom filters to identify users that open but never engage and those who may rarely open, but frequently engage.
Creating segments for your primary subscriber types will not only help you improve overall conversion but you control email marketing costs and have happier subscribers thanks to an engagement schedule that better suits their habits. Oh, you also get the inner-office glory of controlling costs while simultaneously increasing revenue. Huzzah!