If you’re a PC user, there’s a fabulous app that’s been around since the days of Windows 95 but you can easily download from the Microsoft Store for Windows 10 and 11. Unfortunately, Microsoft describes the app using some weapon’s grade jargon: “Microsoft PowerToys is a set of utilities for power users to tune and streamline their Windows experience for greater productivity.”
On the surface, it sounds like it has a minimum understanding threshold in order to use but that couldn’t be further from the truth. The reality is they are super easy to use for Windows users of all experience levels. While the app includes numerous tools, we’re going to look at a small number that can make your arts admin tasks easier immediately.
Install PowerToys
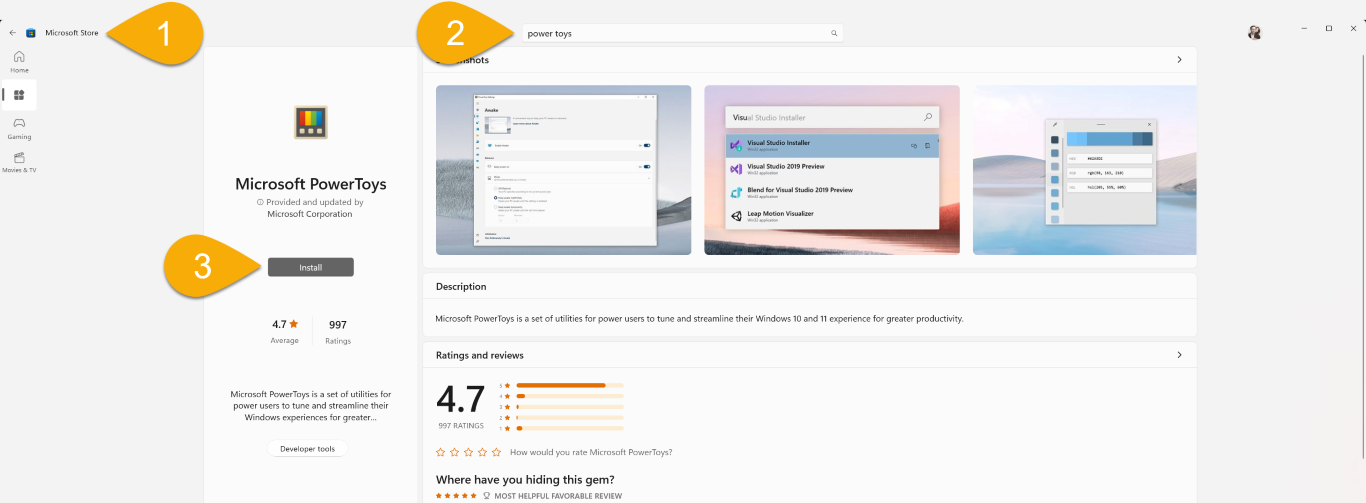
- Open the Microsoft Store App
- Search for “PowerToys” in apps
- Select Install
Once install has done its thing, you can run the PowerToys app from the start menu.
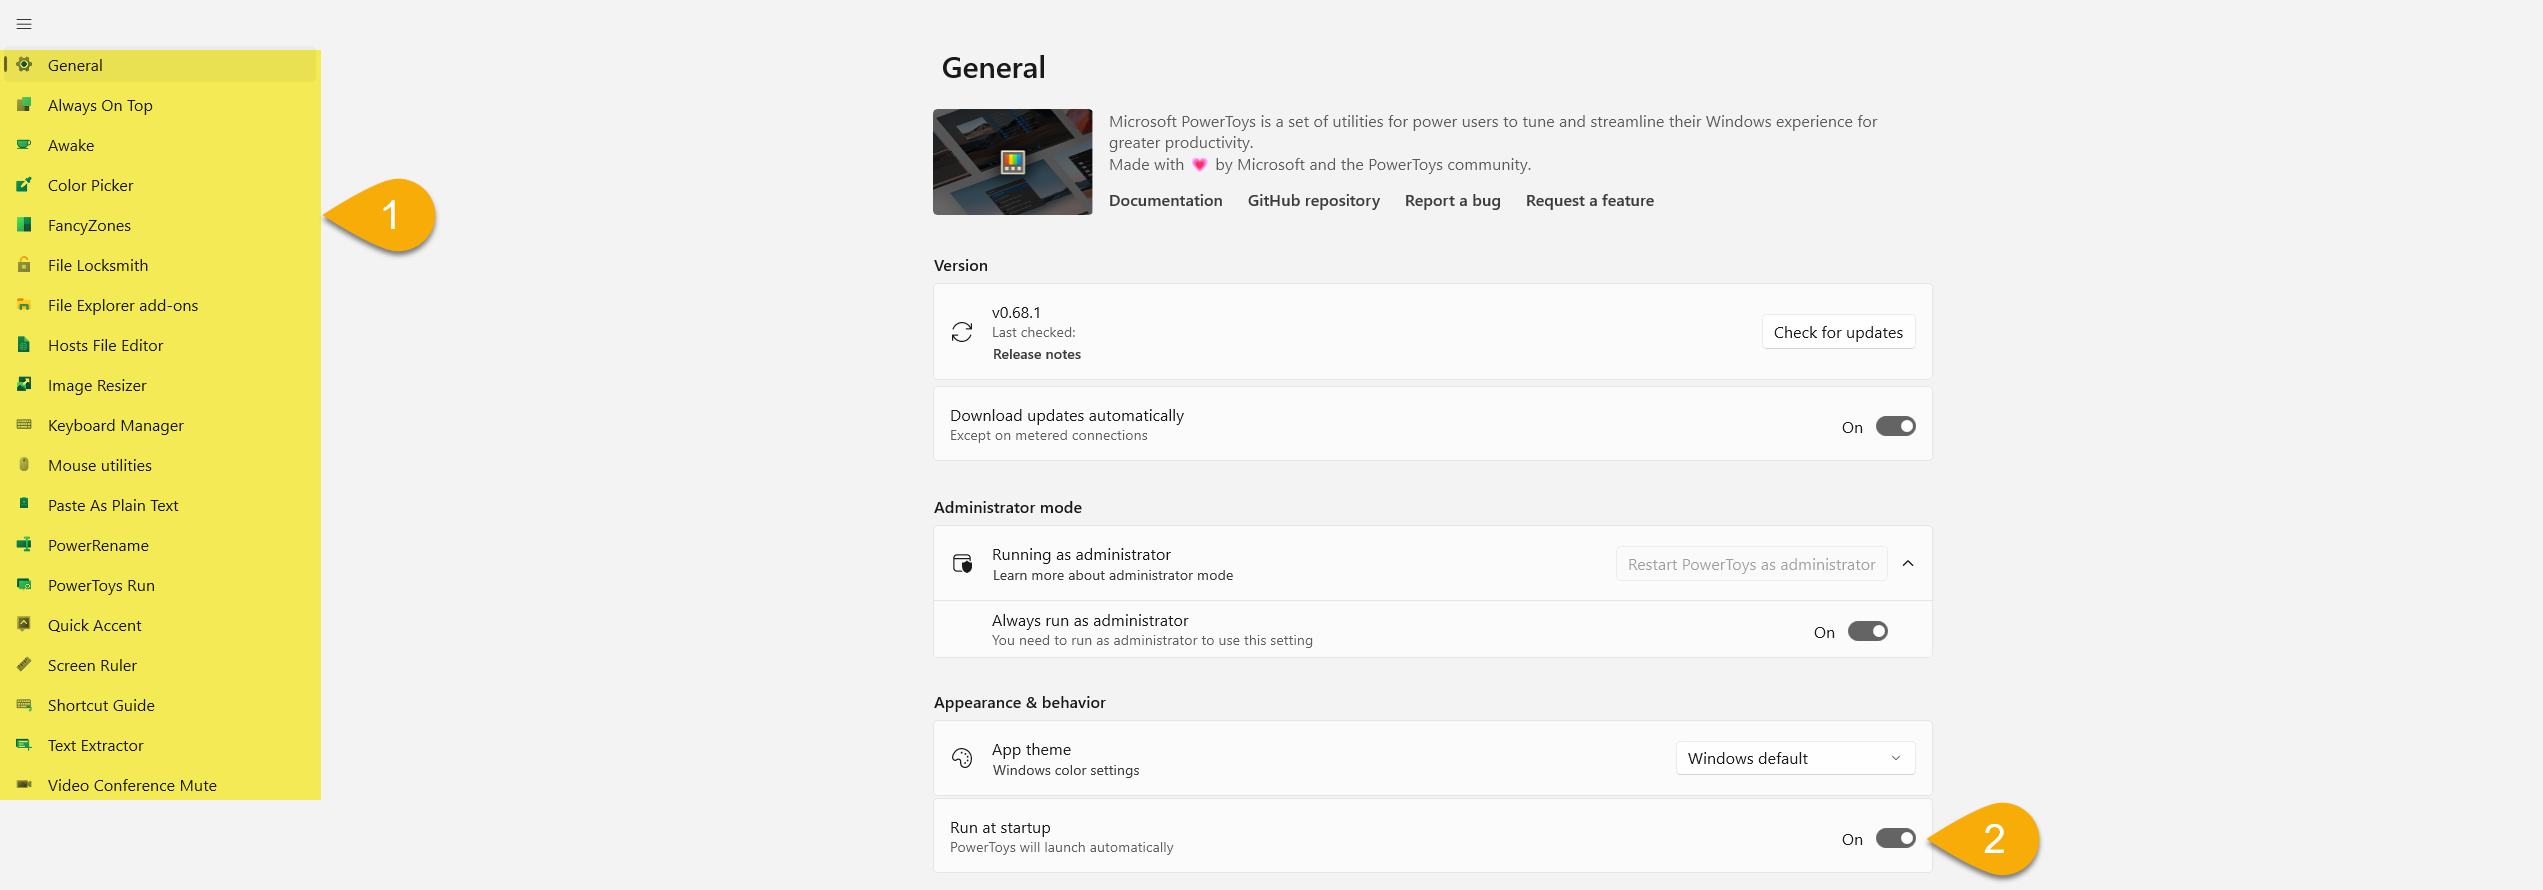
- The full list of available PowerToys
- In the General settings dashboard, I recommend making sure “Run at startup” is activated if you think you’ll be using these tools on a regular basis (spoiler: you probably will).
Essentials PowerToys
FancyZones
Regardless of your screen size, if you ever do any work that requires bouncing back and forth between apps, like copying values from a spreadsheet so you can paste into another app or comparing values side by side from two separate apps (think PDF and DOC files), FancyZones will make your life easier. Instead of having to manually resize each window, you can use default zones that snap each window into position simply by dragging them into position.
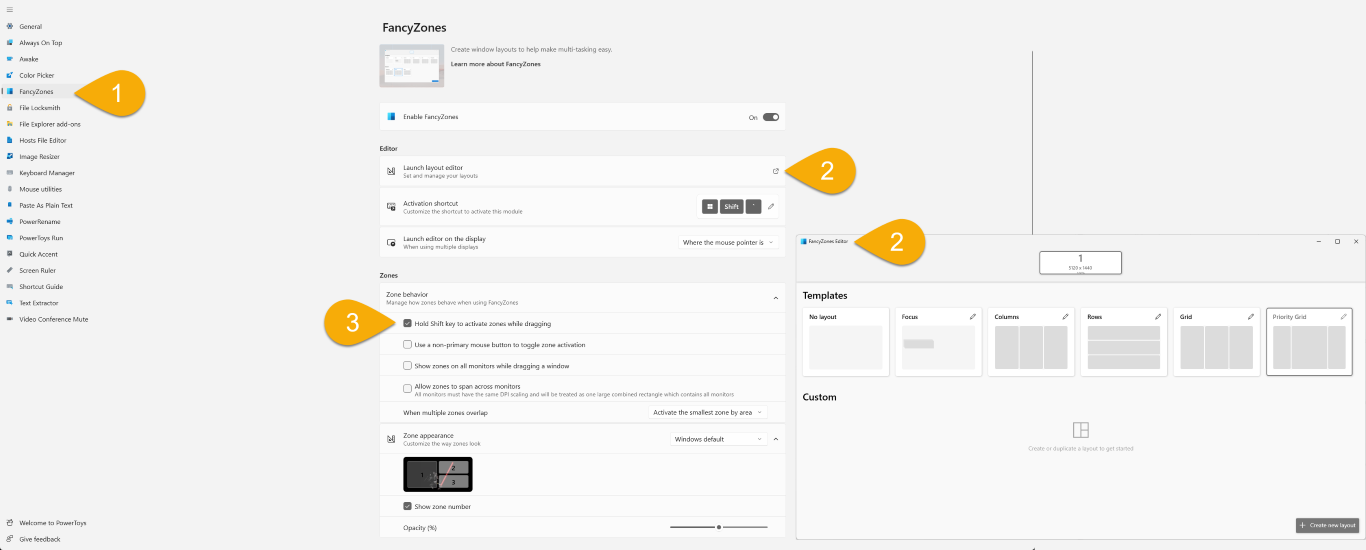
- Go to the FancyZones dashboard.
- Launch the zone editor to create a default zone layout. A popup will appear where you can select between common ready-made options or use the “Create new layout” button to set up something better suited to the apps you use.
- By default, you hold the shift key to drag and snap windows into a zone but you can use other options presented here.
While the other settings may be useful, they aren’t necessary to get the most out of this PowerToy.
Image Resizer
If you don’t have Adobe Creative suite, you’re familiar with the pain it is to create quality optimized images for web use that are as small of a file size as possible. PowerToys provides a superb resizer tool that you can access right from the right click menu. But first, go to its settings page in the app:
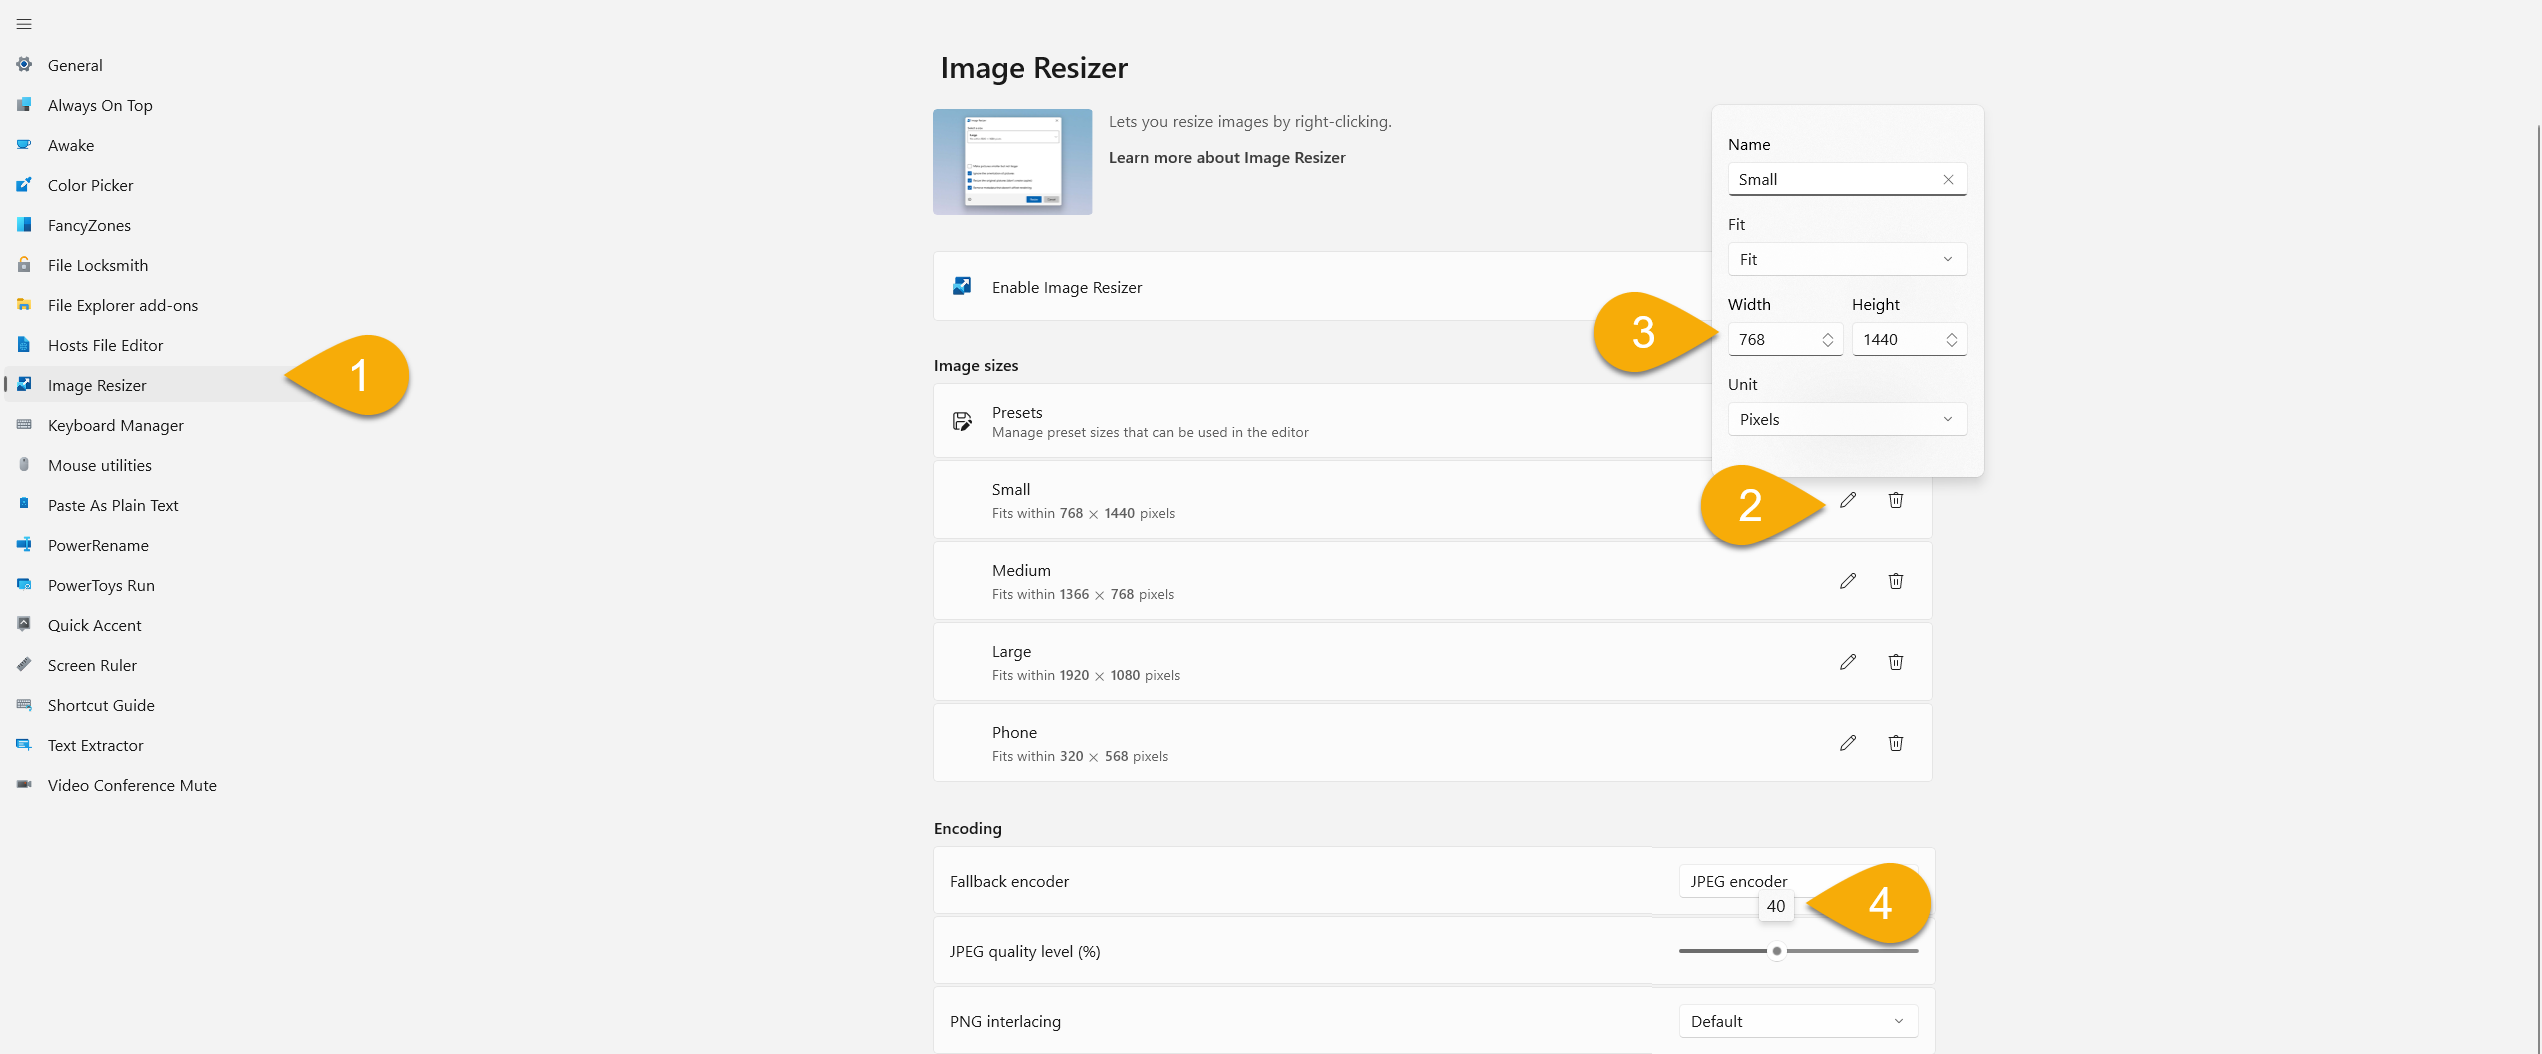
- Go to the Image Resizer dashboard.
- Modify the existing “Small” option (or create a new setting and give it a unique name).
- Use “768” for the width and “1440” for the height. These are max sizes in pixels for the resized image and that range will handle landscape, square, and portrait aspect ratio images.
- In the JPEG quality level, set the slider to “40” and trust me, that’s going to be plenty for all but a few edge case scenarios. Anything larger will generate images that are larger than needed and therefore slow down your page load speeds.
Now you’re ready to use the resize tool.

- In Windows Explorer, nabviate to the folder that has images that need to be resized.
- One of the best features of the resize tool is you can apply it to a single image or in bulk.
- Highlight all the images you want to resize, right click, and select “Resize pictures.”
- In the popup box, select “Small” (or your custom size from the dropdown) and make sure those three checkbox options are selected.
- Select “Resize” and the resizer does it’s magic creating new versions of the existing images.
Fun fact: I used PowerToy’s Resize Image tool for all of the images used in this post so you can see that it does just as good of a job as the step by step images in other posts, which used Adobe Photoshop.
PowerToys Run
This one could be a “maybe” for some arts admins but if you’re not happy with the way Windows 11 system search works, you’re going to love the Run tool.
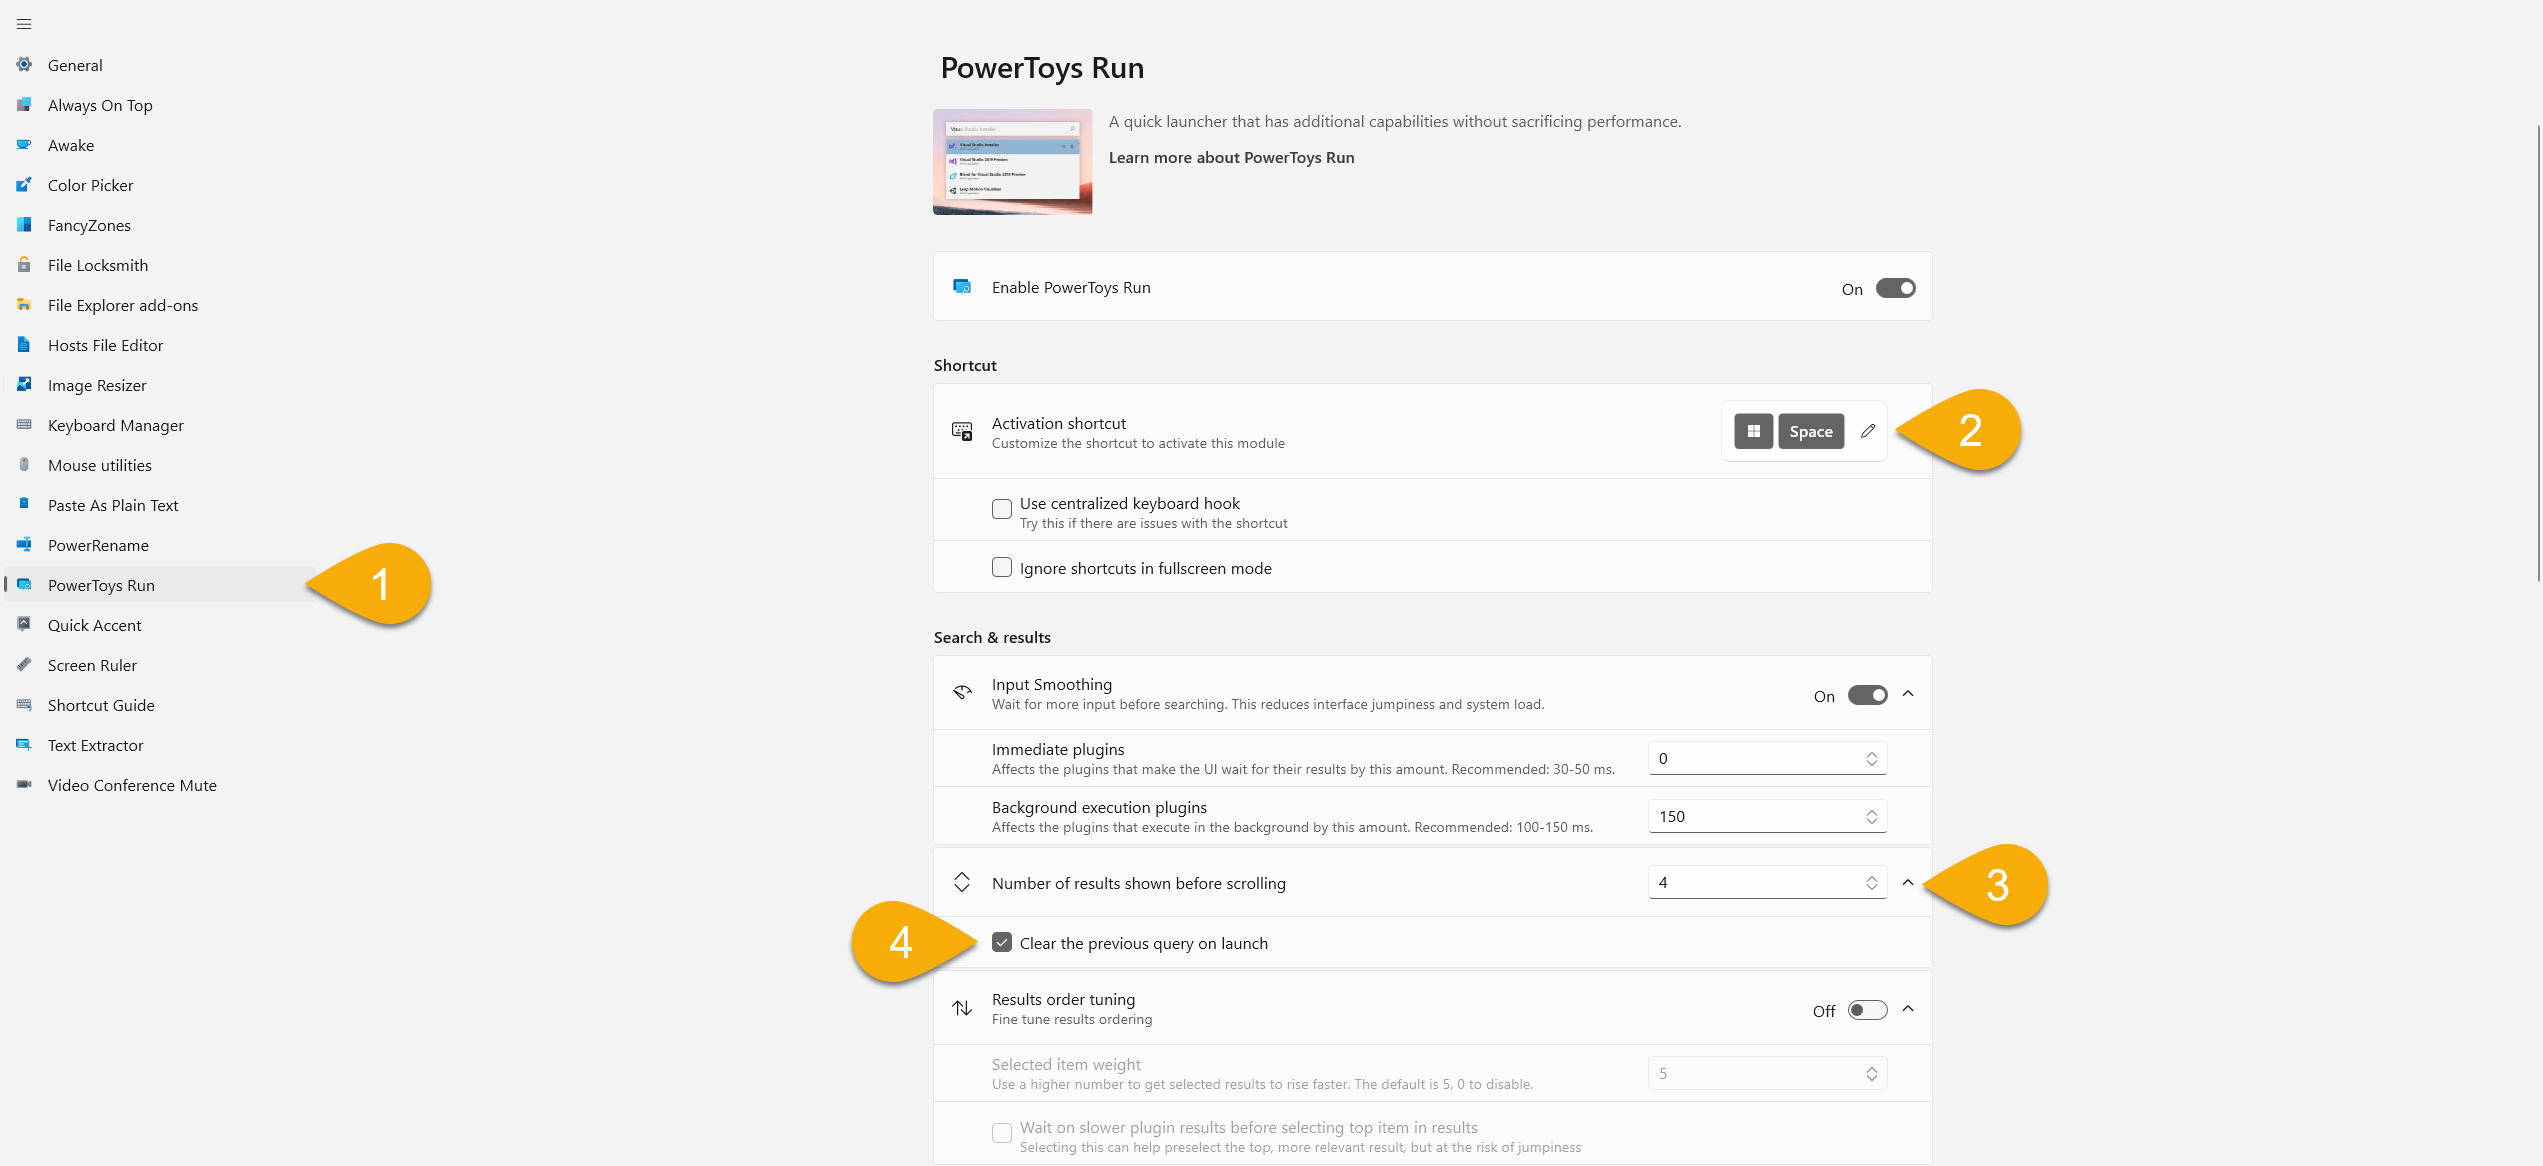
- Go to the PowerToys Run dashboard.
- You can use the default keyboard command but if you’re like me (or used to using the Mac OS), I suggest changing it to the windows key and space.
- Depending on what you typically search for in the system, you may want to increase the default number of items before the scroll kicks in.
- Optional: if you’re like me and don’t like seeing recent searches appear when you’re entering a new search, check this option.
If you’re already a PowerToys user, what tips and tricks can you share and what sorts of tasks do they help with the most?
Thank you for the authoritative read on this issue. To me, being able to actually see the icon in the…