Fine, I’ll say it.
If you’ve got 25 lists in MailChimp (now called “audiences”), you’ve got about 24 too many. In order to easily segment and suppress members of your list, you should have only one main list in which the majority of your contacts live. I know, this is probably different than how you currently have your lists set up. However, I promise this is the way to go in order to send emails to all the specific groups of people you need.
Ok, stay with me here.
Within this main list, you need to have a way to identify who is who, right? The easiest way to do this is by using tags.
Tags were rolled out a few months ago and make life so much easier in terms of identifying who is a member, a ticket buyer, a ticket buyer for Madama Butterfly specifically, a donor to last year’s annual appeal, etc.
First let’s take a look at how you add a tag for your various segments when you’re uploading a list
When you are uploading a list from your ticketing CRM (for example) into MailChimp, go through the list upload process as usual. When you get to the last screen, you will be prompted to select a tag. If you are adding a new tag, simply click on the +, type in the name of the tag, and choose Create Tag.
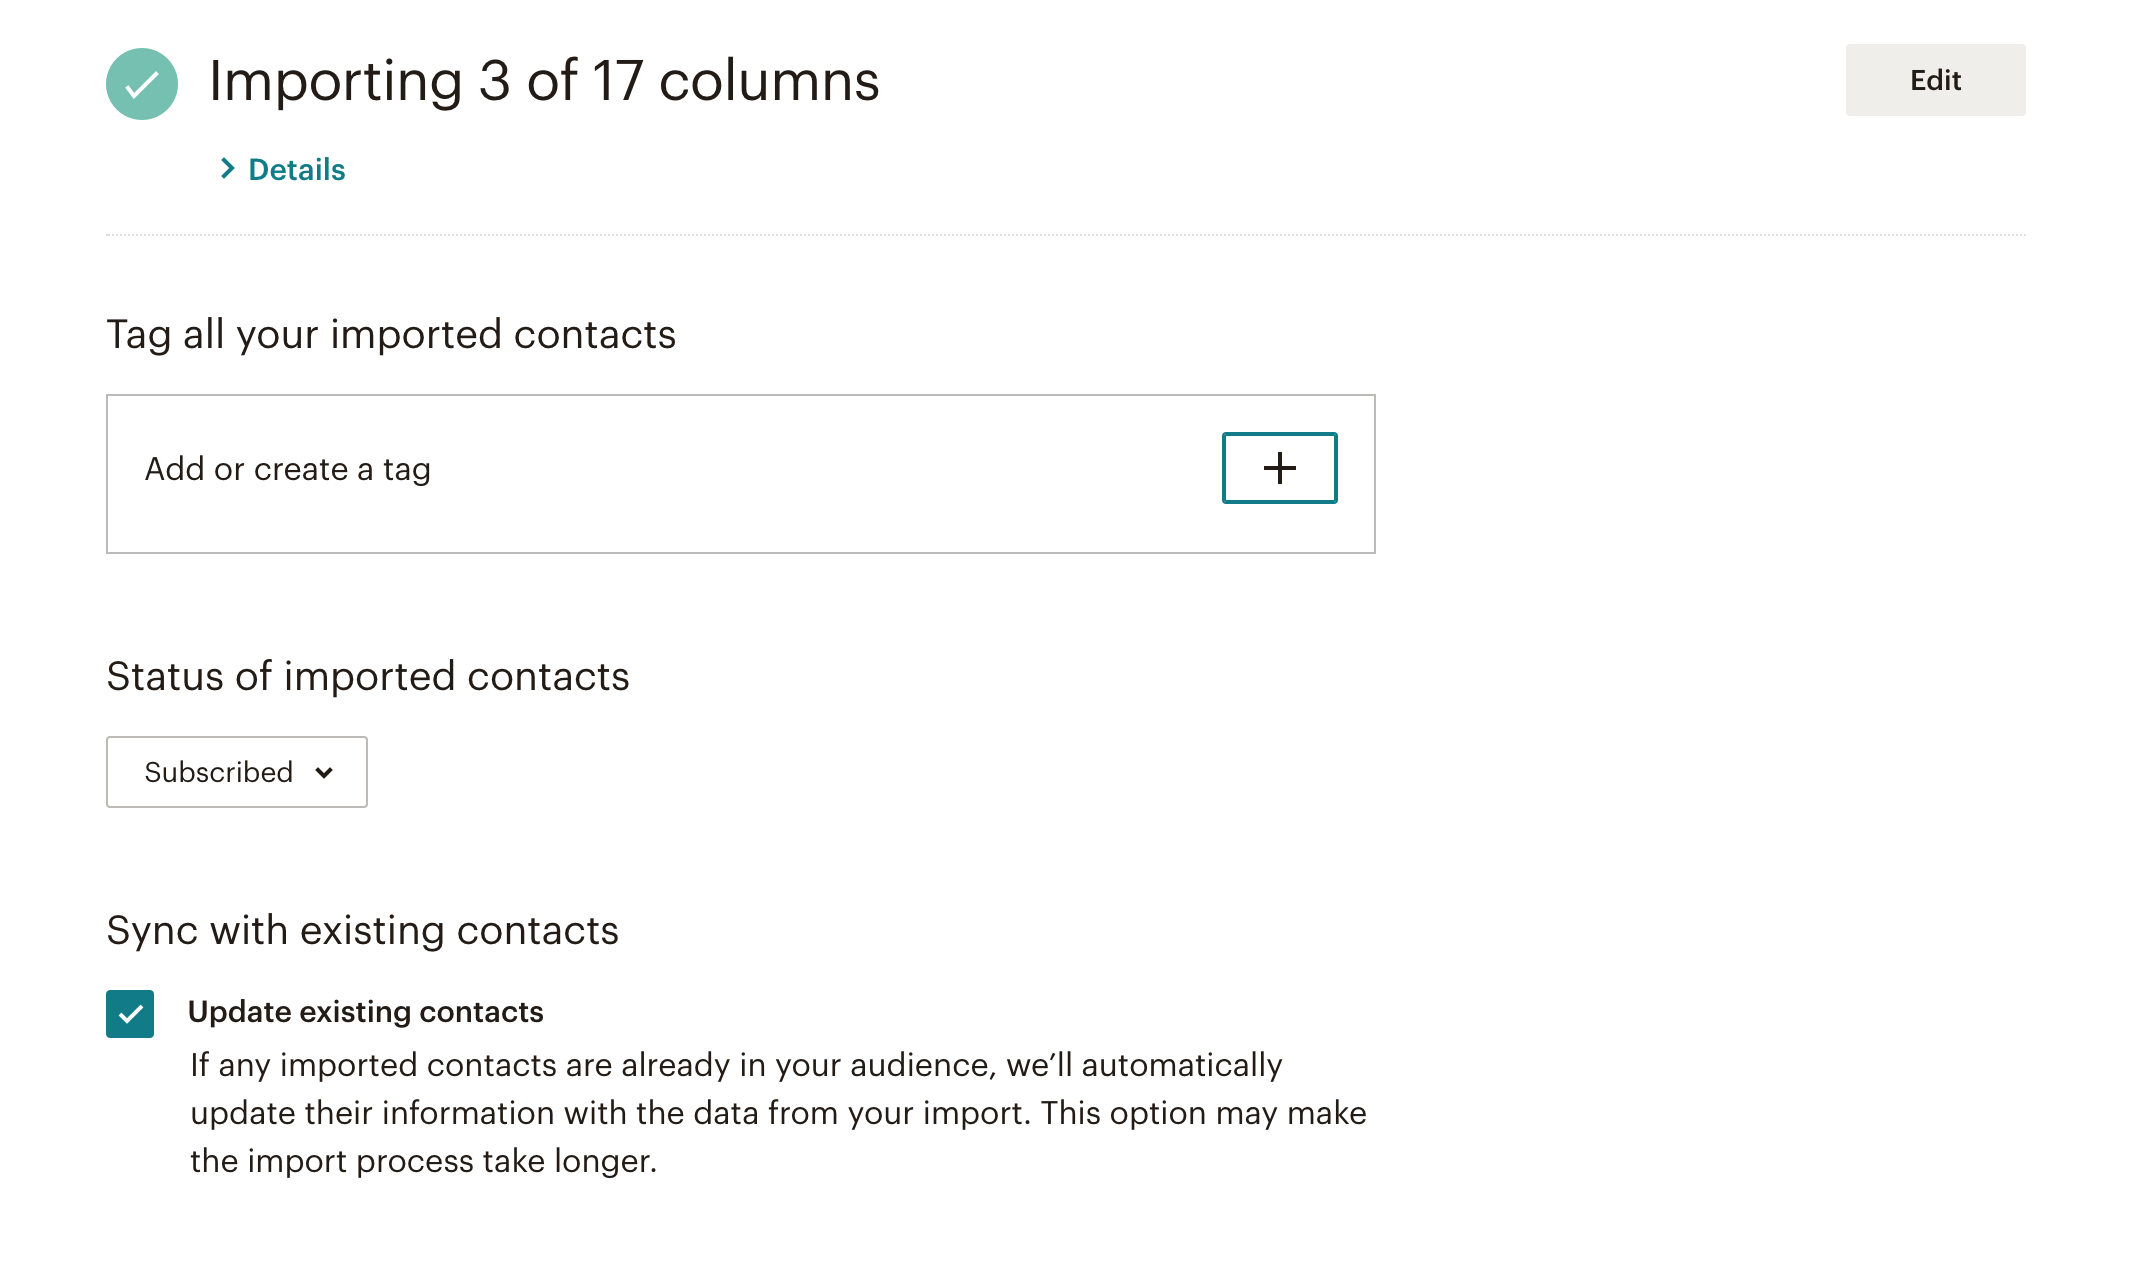
Also, notice that the Update Existing Contacts box is checked. Any time you upload a new list to MailChimp, you want to have that selected so that any new information for a particular record is added. For example, let’s say someone is on your list and you only have their email. Then, in a subsequent upload, that same email address is in there but you also have first name and last name. When you have that box checked, it will add first name and last name to that record.
Now that you have tags, let’s see how we can segment emails using them
This is where things get seriously cool.
Let’s say you are a museum and you have people in MailChimp tagged as Visitors and Members. Members are your members and visitors are people who are not members but who have visited the museum. You’d like to send an email to visitors who are not members who have visited the museum before a certain date.
Here is where we can use MailChimp’s and/or targeting with tags.
When you are selecting to whom the email should be sent, select your main list and then Group or New Segment under Segment or Tag.
Add in your criteria below. In this case, we want people who have an attendance date that is before 3/9/19 AND that are not tagged as a member AND that are tagged as a visitor.
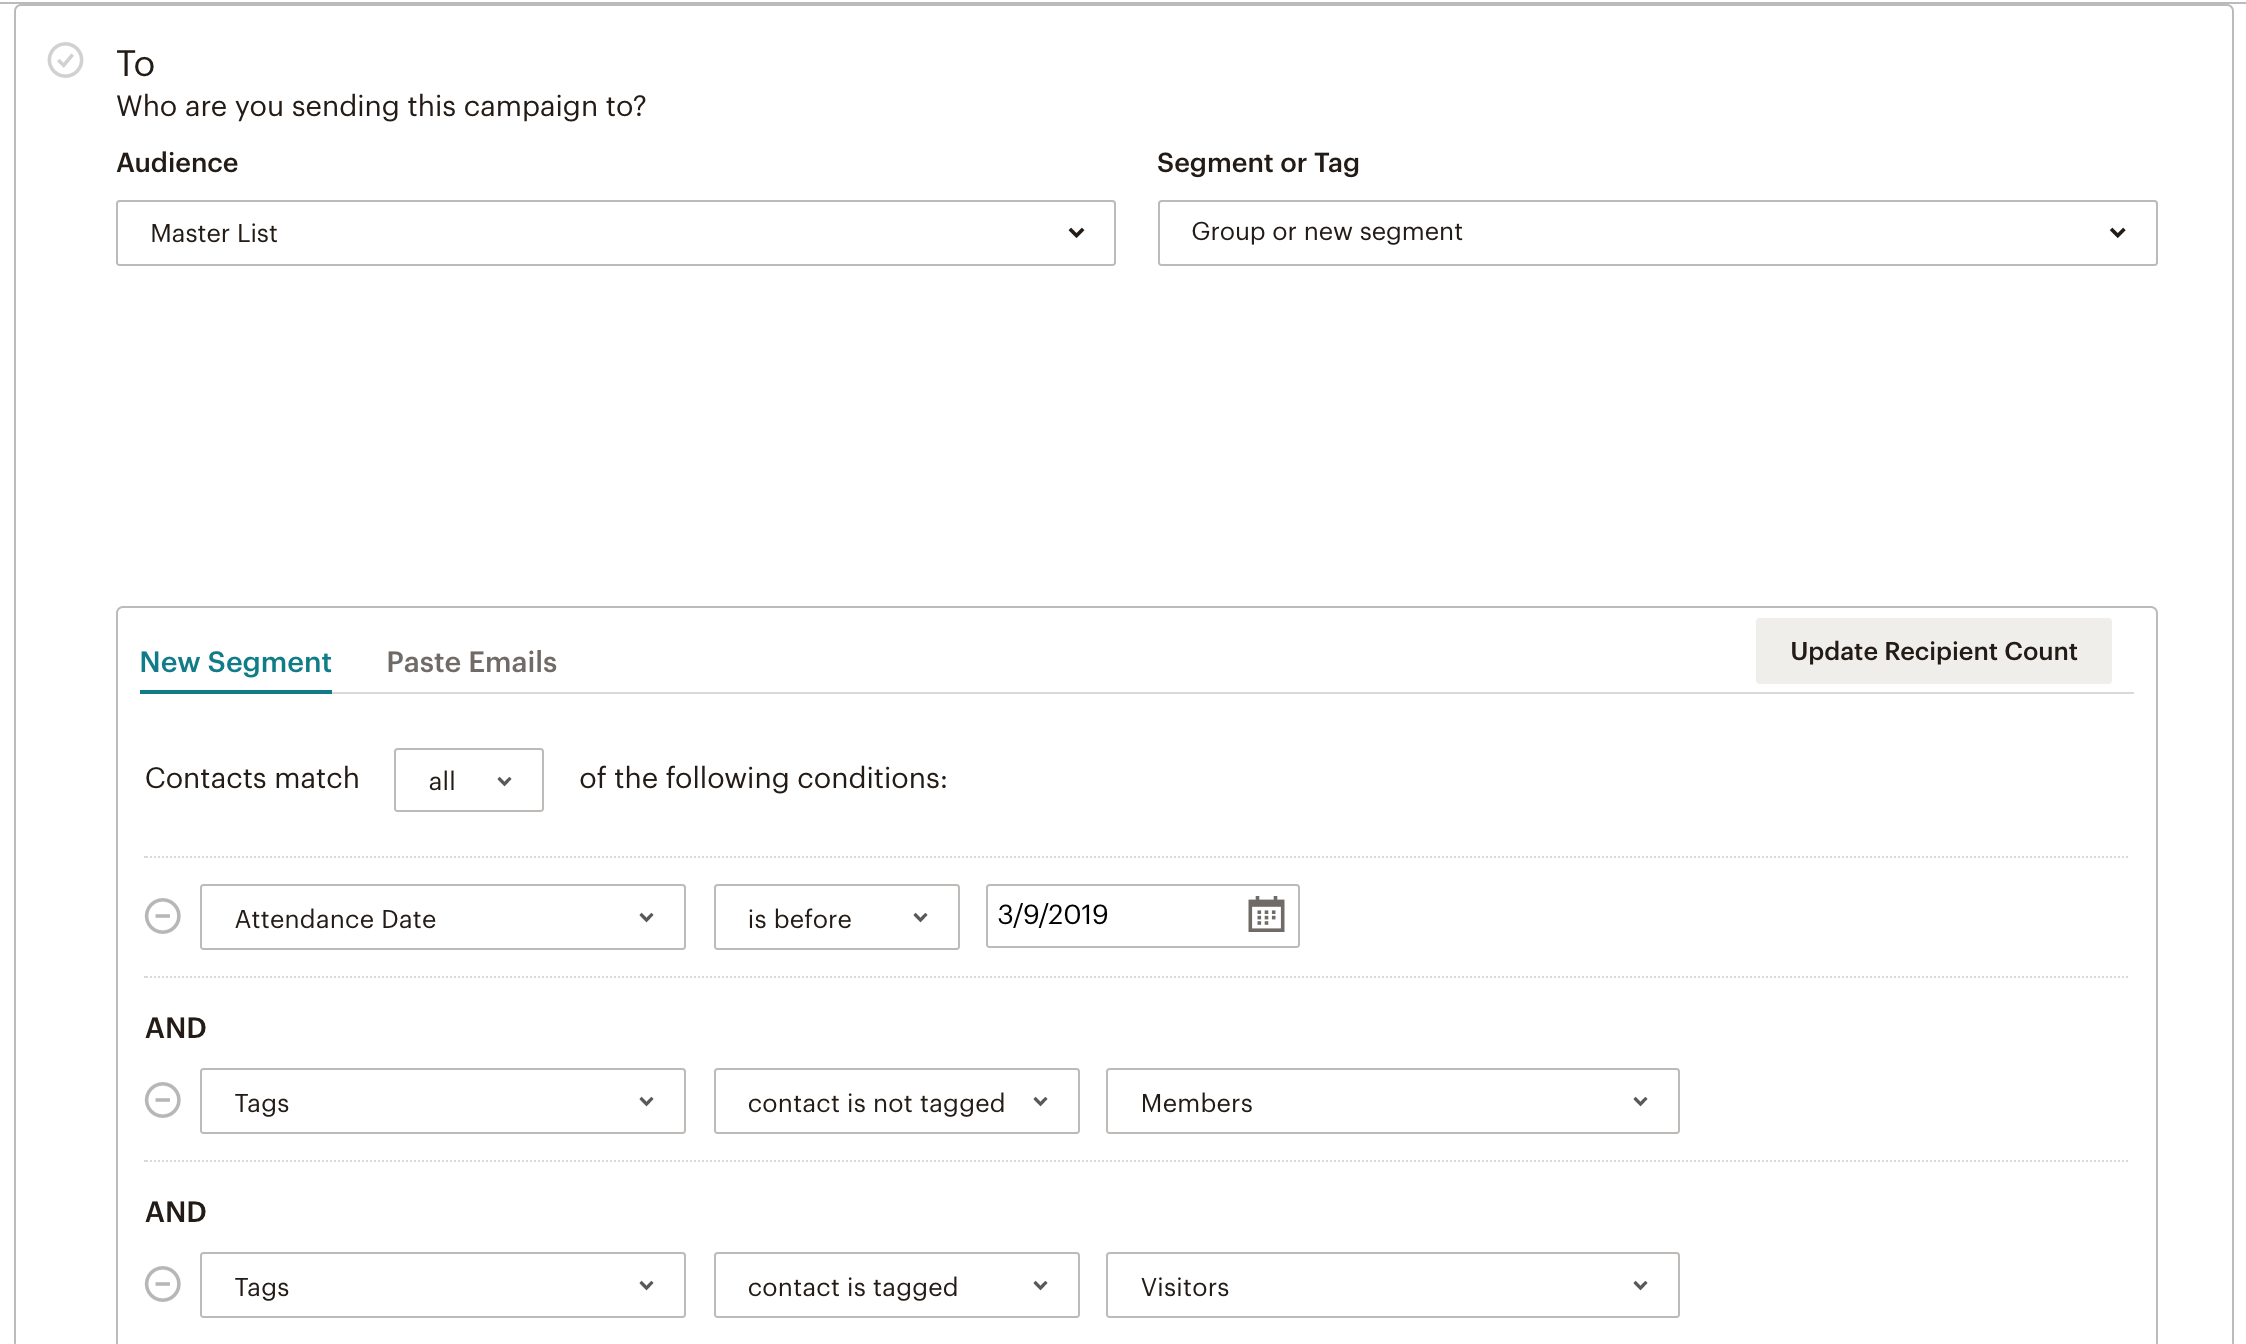
See? This way, we’re using data that is already in MailChimp to segment and exclude rather than having to load in a new list with that criteria already done. (In the example above, the Attendance Date is a custom field that you can create during the import process.)
Using this same method, let’s say you want to send an email to people who were subscribers last year but have not purchased a subscription this year. Of course, you want to suppress people who have already bought a subscription from your sales emails. Here’s how you would do it:
- Audience > Your Master List
- Segment or Tag > New Segment or Tag
- Contacts match ALL of the following conditions
- Tags > Contact is tagged > 2018 Subscriber
- Tags > Contact is not tagged > 2019 Subscriber
For both of these examples to work, you just need to load in the ticket buyer/member/visitor lists as they are. No more editing lists before you load them in.

These are just a couple of simple examples of how this works to get your brain going on how you might be able to use this at your organization. It will save your team time AND keep your MailChimp data clean AND make it easier to send segmented emails. (See what I did there?)
It may take a bit to get a hang of this so, if you’ve got MailChimp segmentation questions, drop me a line and I’m happy to give advice!
Sorry some words were excluded from my comment! I’m wondering if there’s a way to just check the email addresses that I want to send the email to?? It’s only around 20 people so it’s not that hard for me to do it if there’s a way!
Hi Jen, are you talking about the set up stage of creating a segment from your full Audience list?
Hi exclude specific email addresses from a small segment <30. I don't have specific criteria I just know who I don't want to send the email to. I can't seem to find out how to do this.